随着安卓 Root 的需求越来越少,甚至小米解锁 Bootloader 都需要答题,三星也在新版 OneUI 移除了解锁的选项,解锁变得越加困难,不过 Root 后可以带来更多玩法和自定义体验

因此在我 Root 了两年后,将各种模块也试了一遍,最终留下了以下这些我认为有用的 Magisk 面具模块/软件:
AdAway Host 去广告
这款软件我在之前有分享过,通过修改系统 host 文件,屏蔽广告商域名,从而实现软件和网页去广告的效果。
PixelXpert 原生系统 UI 自定义
这是一款面具+LSPosed 的模块(如今 LSPosed 框架也停更了..),曾名 AOSP Mods,由于修改原生系统内的状态栏,锁屏画面,通知,手势操控等等
安装前需先安装 Zygisk 版本的 LSPosed 再安装模块,Github 链接在此
Dolby Atmos 杜比音效
我的用途是增强低音,效果因人而异,不过刷这个模块有变砖风险,谨慎操作
同类模块有Viper4Android,俗称蟒蛇音效
杜比音效有各种版本,这是我所用的版本:Github 链接
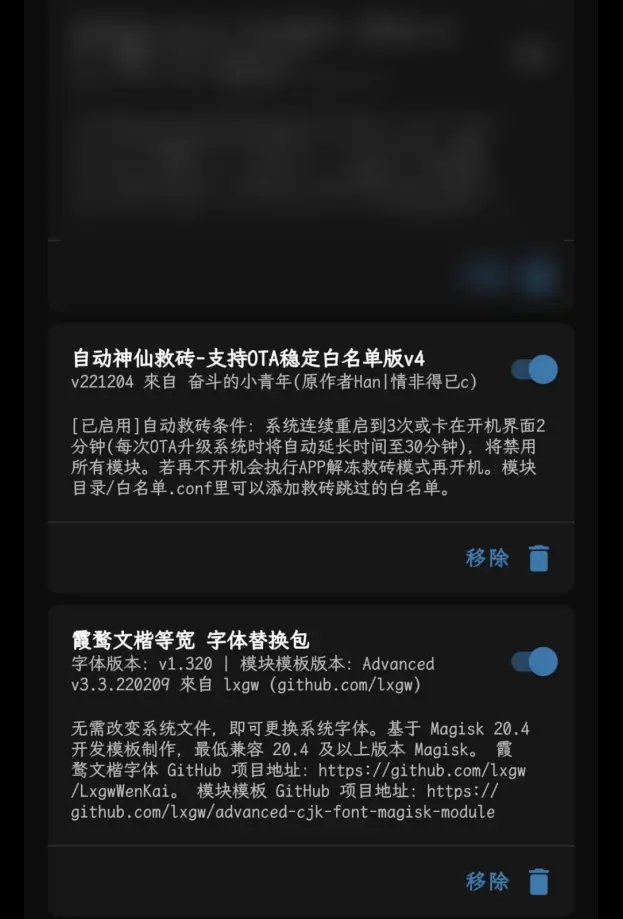
神仙自动救砖
当手机连续重启时自动禁用所有模块达到救砖效果,印象中是有用的
不过对于格机模块无能为力
记得原帖是在 52 论坛但是应该是被删除了,这里有个备份
Reqable Certificate Installer
当时用小黄鸟抓 HTTPS 包时需要安装证书时用的,没有此需求无需安装
Shamiko 隐藏 Root
用于防止各种软件的 Root 检测,若使用 Kitsune Mask(即 Magisk Delta 德尔塔面具)可使用内置 Magisk Hide,无需安装
链接在此:https://lsposed.org
Lucky Patcher 幸运破解器
去除应用内广告,看着很老的界面但还在更新
修改后有一定机率导致软件闪退
链接请自行搜索
AppOps 权限管理
这是吸引我买了完整版的软件之一,完整版可以於新软件安装时按照模板自动设置权限(如返回空白剪贴板等)
需要配合Shizuku使用,而AppOps 链接在此
最后,绝对不推荐安装各种有关某两个通讯软件的模块,微 X 模块害得我…
而且最近绿色软件大范围封号,在用的建议暂时禁用