2026.1.17 更新:到目前一切正常,存了快 300GB 的照片,等之后空间不够后再考虑扩容
先看配置:
| 机箱+主板+散热 | NEC8 (联想 M720Q 日版)准系统 |
| CPU | Intel Pentium Gold G5420T |
| 内存 | 三星 DDR4 4GB 3200Mhz x2 |
| 系统盘 | Hynix BC501 128GB |
| 数据盘 | Intel 660p 512GB |
| 电源 | 副厂 90W 电源 |
| 其他 | PH39 PCI-E 转 M.2 硬盘,用于 NEC8 的 PCI-E 转接器 |
原本是打算用一台 N95/N100/N150 这类的小主机/MINI PC 来做一台类似 homelab 的设备,但是发现这台 NEC 8(NEC 已被联想收购,8 代表第八代)性价比似乎更高(最便宜的应该是 X 唐的 N150 主机但也要快 700 元,而且只有两个硬盘插槽,更重要的是 NEC 8 有 PCI-E 插槽,可以拓展更多硬盘,甚至可以塞进一张半高显卡)
而购买主机后,下一步要考虑的是 CPU,看了一堆评论后剩下 I3-8100(T)及 G5420T 二选一,而我选了后者,主要考虑到这台主机并不会参与到(很多的)视频转码,所以对集显要求不高,UHD 610 已绰绰有余
内存方面,手上刚好有两条之前剩下来三星 4GB 内存,刚好可以装上去
主板自带了一个M.2 插槽,另有一个未焊接的焊盘,也就是整台主机最高可以装 6 条 M.2 固态(主板两条,PCI-E 拆分四条 x1 通道),但是因为预算原因,我只装了 1 个系统盘和 1 个数据盘 (当然也可以拓展普通 SATA 接口,但是供电会是一个问题)
最后整套主机加起来不到 700 元(不算内存),如果把内存也加上大概八百多到九百吧
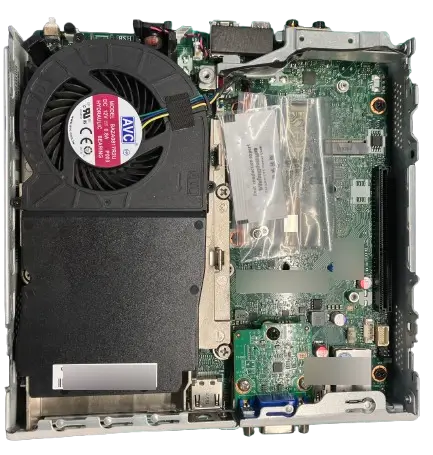
组装主机
到货后发现主机已经被翻新了一遍,能闻到一股 WD40 的味道,外壳有些许掉漆但可以接受
打开主机可以发现卖家送了一包硅脂,不过我自己另外买了一管所以没有用上
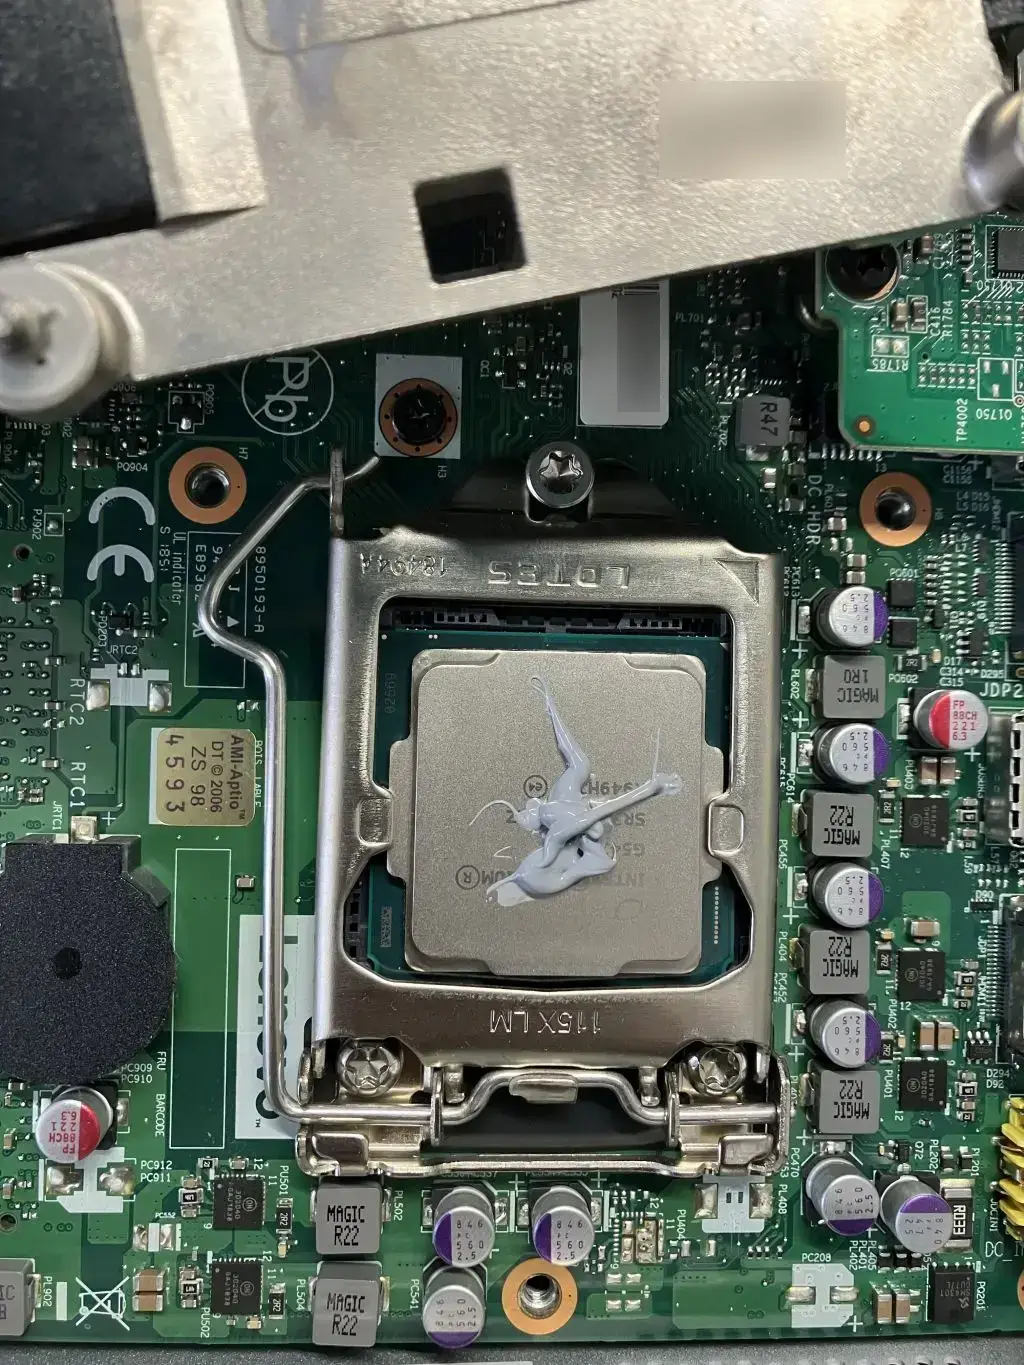
拿掉散热器,装上 CPU
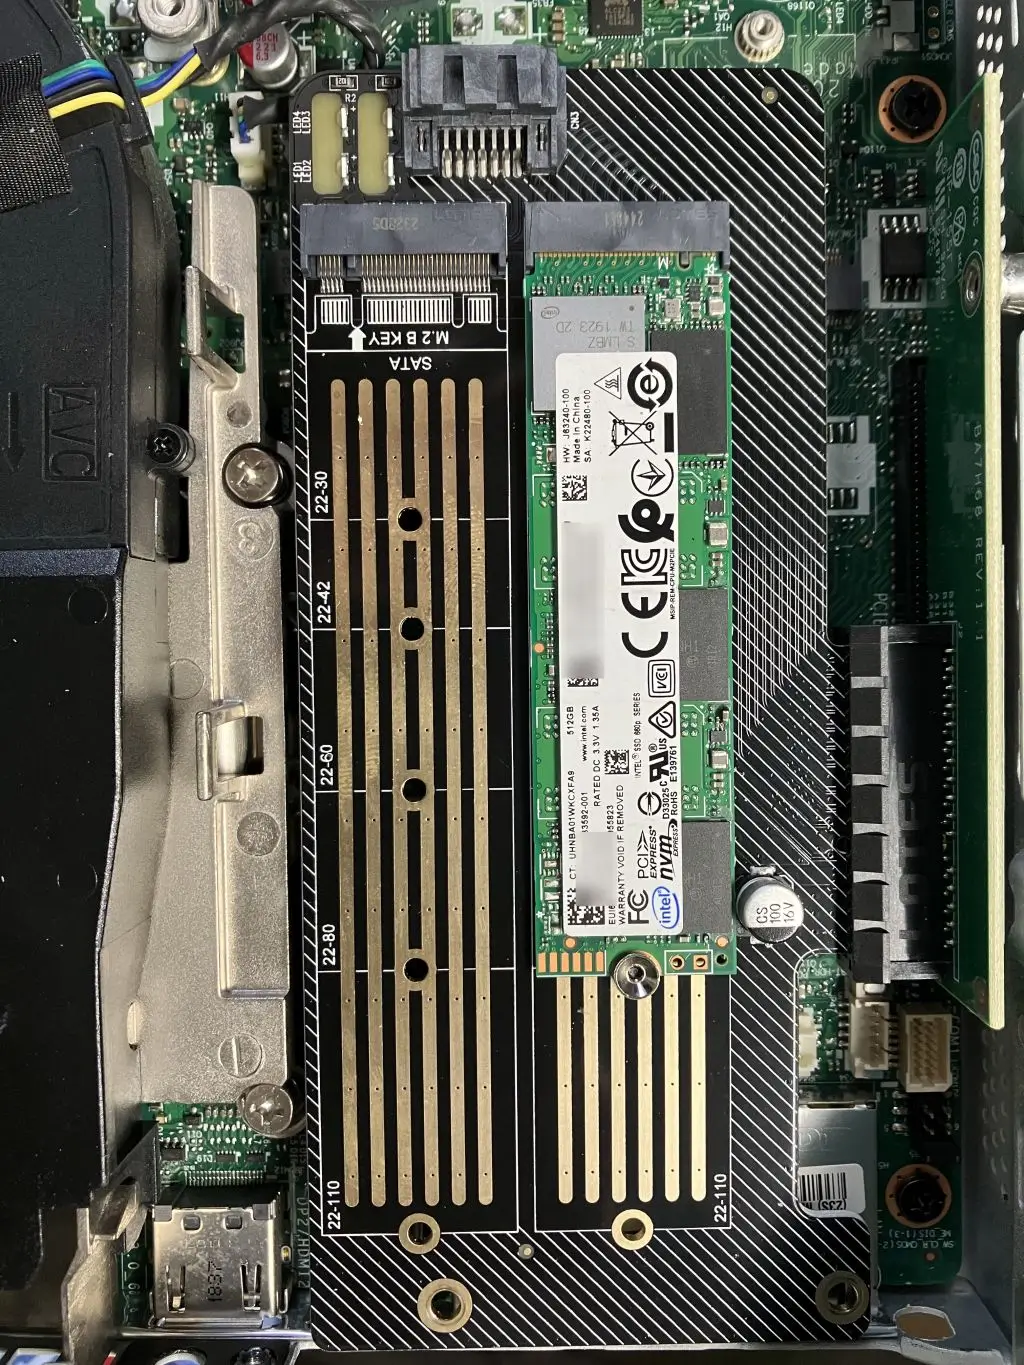
装上 PCI-E 转 M.2 拓展卡(拓展卡要把挡板拆掉才能塞进去)
装的时候发现我买错了拓展卡,这张只能装一条 M Key 和一条 B Key,本来以为可以同时装两条 M Key 的,等有需要再换一张
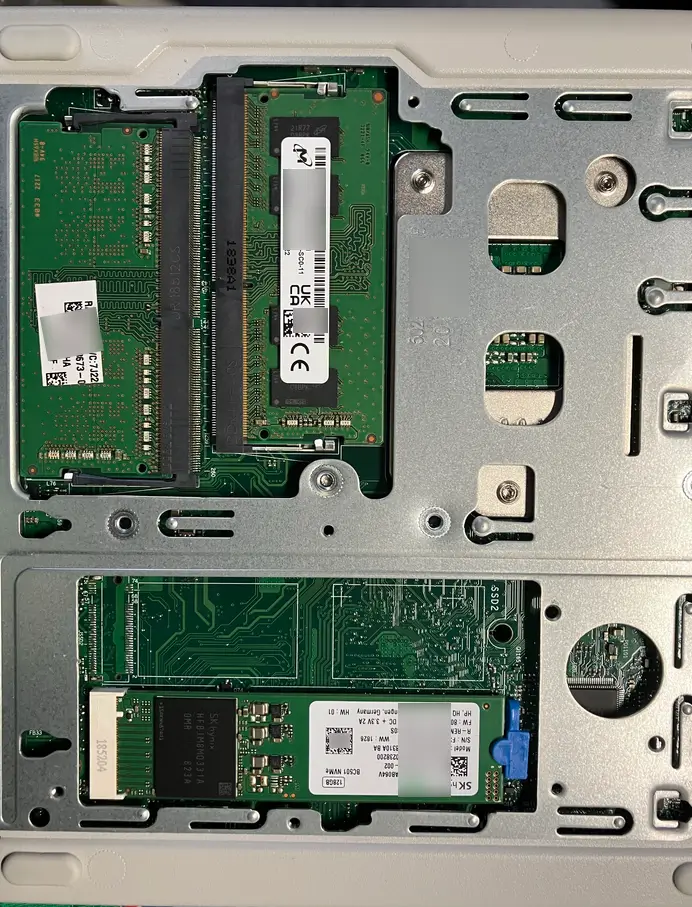
在机器反面装上内存以及硬盘
安装系统
系统我用的是黑群 DSM 7.2,参考了这个教程:http://www.nas50.cn/?id=21 以及 RR Org 也就是俗称 RR 引导
基本上按照以上的教程安装系统就行了,注意编译时一定要安装nvmesystem插件否则装不上系统
这里简单记录一下步骤:
首先,从 GitHub 页面下载并解压 rr.img 后用 Rufus 写入引导盘,将主机连接电源,网线,显示器(采集卡),键盘(我用的是之前十几块买的无线飞鼠)
插入引导盘,开机按F2进入 BIOS
在 Security>Secure Boot 内把 Secure Boot 关闭,再到 Startup>Primary Boot Sequence 内用+/-键把引导盘优先级调到最高
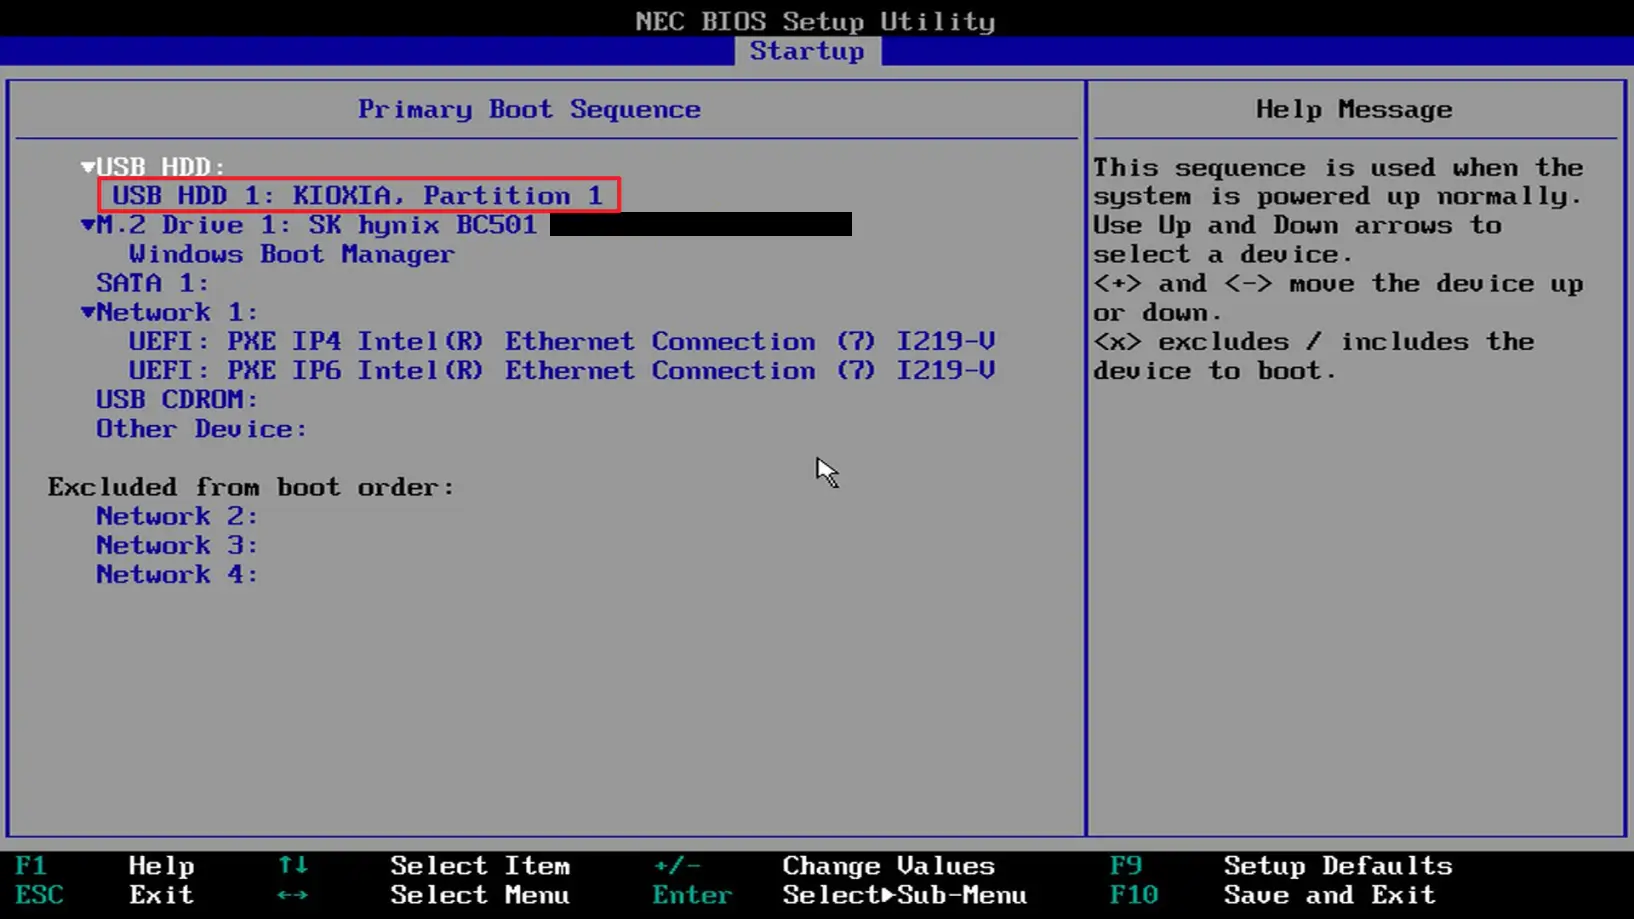
按 F10 保存重启,进入到 RR 引导界面
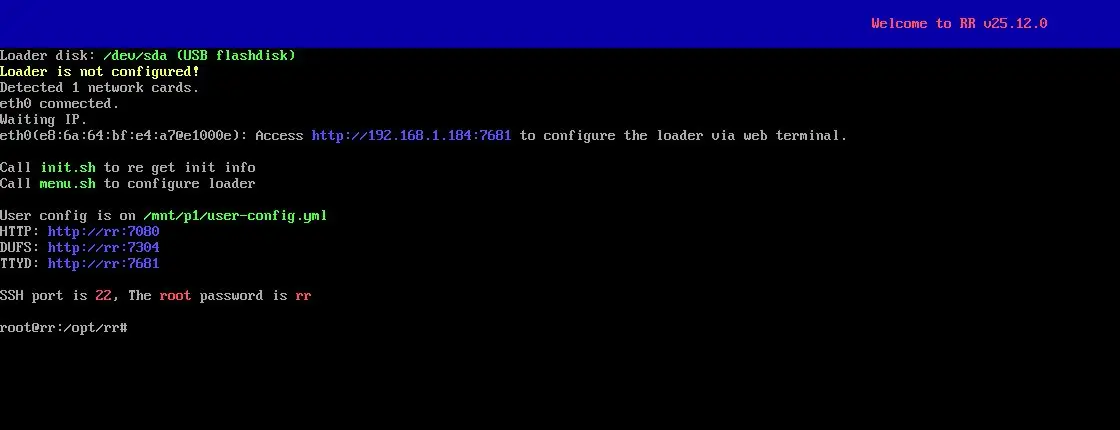
浏览器打开 IP:7681 后,选择型号(SA6400),DSM 版本(DSM7.2)后编译引导(具体可以看上面的教程,这里不多叙述)
编译完成后打开 IP:5000,初始化 NAS
初始化时问要不要登录账号,选不用
安装应用
目前安装了以下的应用:
- Portainer (Docker 管理器)
- Immich (照片图库+AI 相册)
安装 Portainer
SSH 进主机,sudo -i 获取 root 权限后运行:
docker run -d --name=portainer \
-p 9000:9000 \
-v /var/run/docker.sock:/var/run/docker.sock \
-v /volume1/docker/portainer:/data \
--restart=always \
portainer/portainer-ce其中/volume1/docker/portainer 要改为实际的目录
运行后访问 IP:9000 初始化设置
安装 Immich
到 Portainer 内的 local>Stacks,新建一个 Stack
#
# WARNING: To install Immich, follow our guide: https://docs.immich.app/install/docker-compose
#
# Make sure to use the docker-compose.yml of the current release:
#
# https://github.com/immich-app/immich/releases/latest/download/docker-compose.yml
#
# The compose file on main may not be compatible with the latest release.

name: immich

services:
  immich-server:
    container_name: immich_server
    image: ghcr.io/immich-app/immich-server:${IMMICH_VERSION:-release}
    # extends:
    #   file: hwaccel.transcoding.yml
    #   service: cpu # set to one of [nvenc, quicksync, rkmpp, vaapi, vaapi-wsl] for accelerated transcoding
    volumes:
      # Do not edit the next line. If you want to change the media storage location on your system, edit the value of UPLOAD_LOCATION in the .env file
      - ${UPLOAD_LOCATION}:/data
      - ${PHOTO_LOCATION}:/home/user/photos1:ro
      - /etc/localtime:/etc/localtime:ro
    env_file:
      - stack.env
    ports:
      - '2283:2283'
    depends_on:
      - redis
      - database
    restart: always
    healthcheck:
      disable: false

  immich-machine-learning:
    container_name: immich_machine_learning
    # For hardware acceleration, add one of -[armnn, cuda, rocm, openvino, rknn] to the image tag.
    # Example tag: ${IMMICH_VERSION:-release}-cuda
    image: ghcr.io/immich-app/immich-machine-learning:${IMMICH_VERSION:-release}
    # extends: # uncomment this section for hardware acceleration - see https://docs.immich.app/features/ml-hardware-acceleration
    #   file: hwaccel.ml.yml
    #   service: cpu # set to one of [armnn, cuda, rocm, openvino, openvino-wsl, rknn] for accelerated inference - use the `-wsl` version for WSL2 where applicable
    volumes:
      - model-cache:/cache
    env_file:
      - stack.env
    restart: always
    healthcheck:
      disable: false

  redis:
    container_name: immich_redis
    image: docker.io/valkey/valkey:9@sha256:fb8d272e529ea567b9bf1302245796f21a2672b8368ca3fcb938ac334e613c8f
    healthcheck:
      test: redis-cli ping || exit 1
    restart: always

  database:
    container_name: immich_postgres
    image: ghcr.io/immich-app/postgres:14-vectorchord0.4.3-pgvectors0.2.0@sha256:bcf63357191b76a916ae5eb93464d65c07511da41e3bf7a8416db519b40b1c23
    environment:
      POSTGRES_PASSWORD: ${DB_PASSWORD}
      POSTGRES_USER: ${DB_USERNAME}
      POSTGRES_DB: ${DB_DATABASE_NAME}
      POSTGRES_INITDB_ARGS: '--data-checksums'
      # Uncomment the DB_STORAGE_TYPE: 'HDD' var if your database isn't stored on SSDs
      # DB_STORAGE_TYPE: 'HDD'
    volumes:
      # Do not edit the next line. If you want to change the database storage location on your system, edit the value of DB_DATA_LOCATION in the .env file
      - ${DB_DATA_LOCATION}:/var/lib/postgresql/data
    shm_size: 128mb
    restart: always

volumes:
  model-cache:
下方.env 文件里输入:
# You can find documentation for all the supported env variables at https://docs.immich.app/install/environment-variables

# The location where your uploaded files are stored
UPLOAD_LOCATION=/volume1/docker/immich/uploads

# The location where your database files are stored. Network shares are not supported for the database
DB_DATA_LOCATION=/volume1/docker/immich/data

# Additional Location
PHOTO_LOCATION=/volume1/photo

# To set a timezone, uncomment the next line and change Etc/UTC to a TZ identifier from this list: https://en.wikipedia.org/wiki/List_of_tz_database_time_zones#List
# TZ=Etc/UTC

# The Immich version to use. You can pin this to a specific version like "v2.1.0"
IMMICH_VERSION=v2

# Connection secret for postgres. You should change it to a random password
# Please use only the characters `A-Za-z0-9`, without special characters or spaces
DB_PASSWORD=postgres

# The values below this line do not need to be changed
###################################################################################
DB_USERNAME=postgres
DB_DATABASE_NAME=immich
其中UPLOAD_LOCATION代表图片上传到的目录,DB_DATA_LOCATION代表存放数据的目录,PHOTO_LOCATION代表已有照片的目录(可选)
具体请看官方教程
目前就这样,还在研究有什么好玩的项目可以装,待以后再更新
不过要注意黑群千万不能开 QuickConnect,也不要更新系统
Web hosting by

199和999都是不足千元,精确一点^_*,精确一点我好抄作业
我已添加大佬的友链
我的友链信息:
名称:光昭
图片:https://akicdn.cn-nb1.rains3.com/pic/avatar/avatar-az.jpg
地址:https://www.pyrzo.com
描述:あまねく奇跡の始発点
收到~已添加
博客打不开,这边先下链了
抱歉,域名正在进行备案所以要停解析,备案完就恢复,到时候我再来提醒您
好的
大佬你好,我的站已经恢复访问了
ok
白群晖就是系统贵,设备性能上真不行!
系统确实是其他牌子比不上的
我去年暑假买的N150小主机,8+128版本600多,也是挺划算的😎
N150比我这台性能还高点!
功耗是个问题吧。我打算高考完配一个N305或者N150来替代我这个树莓派,性能太差了
可以看看n95迷你主机,记得有一台700左右的准系统不错
n95会不会性能有点低了
看跑分n95和n150的结果相差不大